Creating a webmail account on cPanel is a simple yet essential process that empowers you to manage your email effectively from your own domain. Whether for business or personal use, having a dedicated email address associated with your domain enhances your professionalism and credibility. In this guide, we will walk you through the steps to set up your webmail account, ensuring that you can communicate securely and efficiently. By following these instructions, you’ll be equipped to leverage the full potential of your webmail, streamlining your email communication and organization.
What is cPanel?
cPanel is a web hosting control panel that provides a graphical interface and automation tools designed to simplify the management of websites. It offers various features, including email account management, file management, database management, and much more.
Benefits of Using Webmail
- Accessibility: Access your email from any device with an internet connection.
- User-Friendly Interface: Most webmail applications have intuitive interfaces, making email management easier.
- Custom Domain: Having an email account associated with your domain (e.g., info@yourdomain.com) enhances your brand’s professionalism.
Step-by-Step Guide to Create a Webmail Account in cPanel
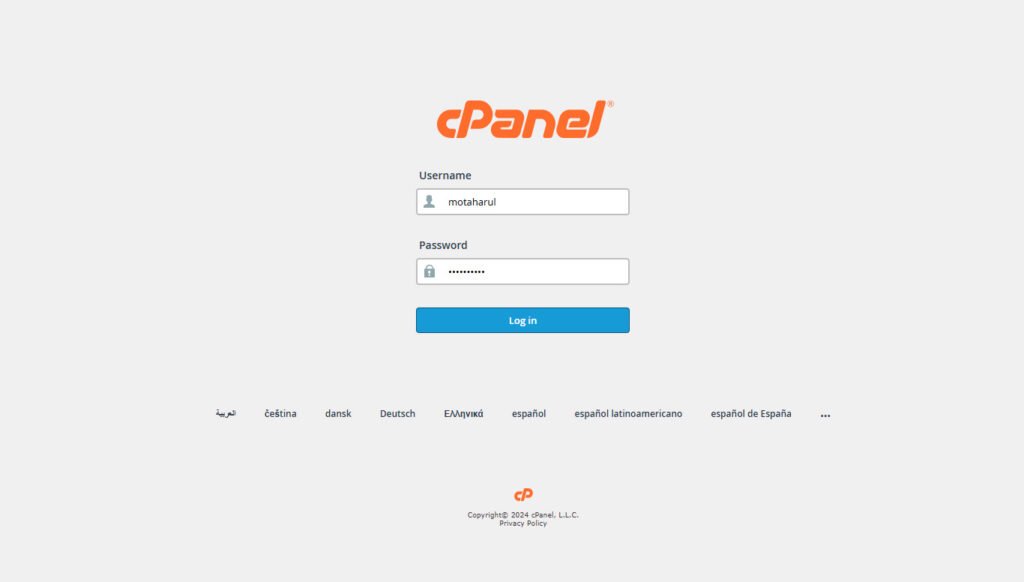
Step 1: Log in to cPanel
To get started, you need to log in to your cPanel account. Typically, you can access cPanel by navigating to:
https://yourdomain.com/cpanel
Enter your Web Hosting Cpanel username and password to log in.

Step 2: Navigate to Email Accounts
Once logged in, locate the Email Accounts icon in the Email section of the cPanel dashboard. This is where you can manage all your email accounts.

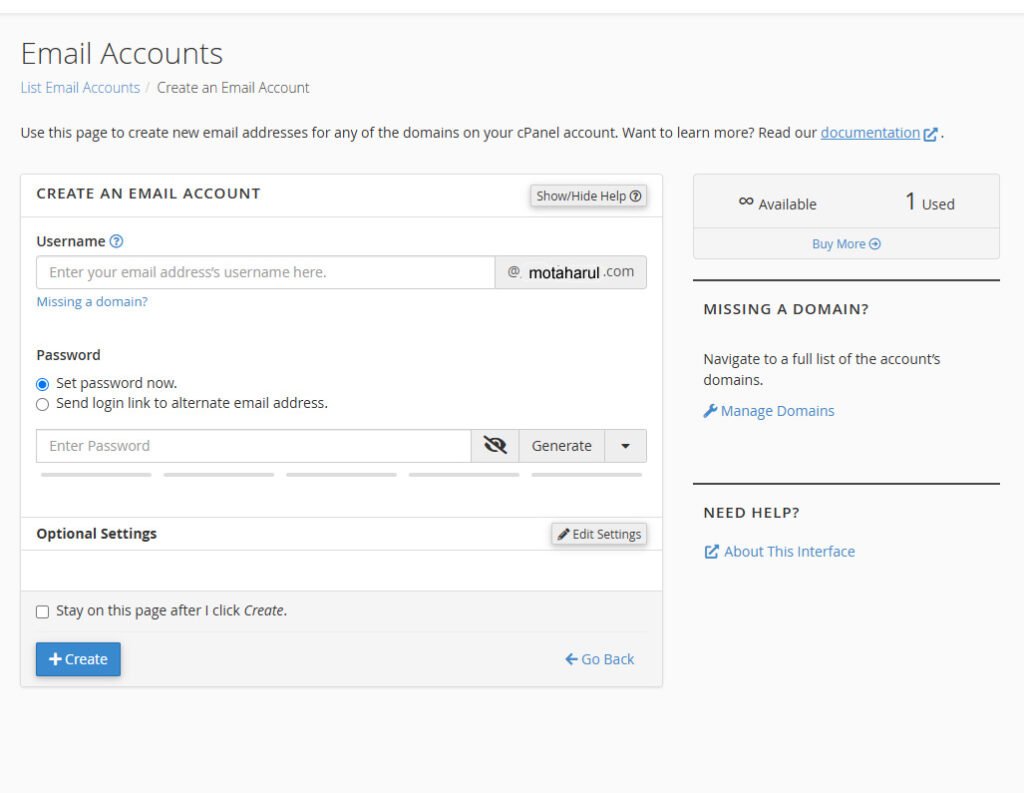
Step 3: Create a New Email Account
- Click on the Email Accounts icon.
- You will see an option to Add an Email Account in the Email Accounts section. Fill out the required fields:
- Email: Enter the username or prefix for your email address (e.g., for john@yourdomain.com, enter “john”).
- Domain: Select the domain you want to create the email account (if you have multiple domains).
- Password: Create a secure password for the email account. Ensure it is strong enough to protect against unauthorized access.
- Mailbox Quota: Optionally, set a storage limit for the mailbox.

Step 4: Create the Account
After filling out the necessary details, click on the Create button. Your new email account will now be listed in the Email Accounts section.

Step 5: Access Webmail
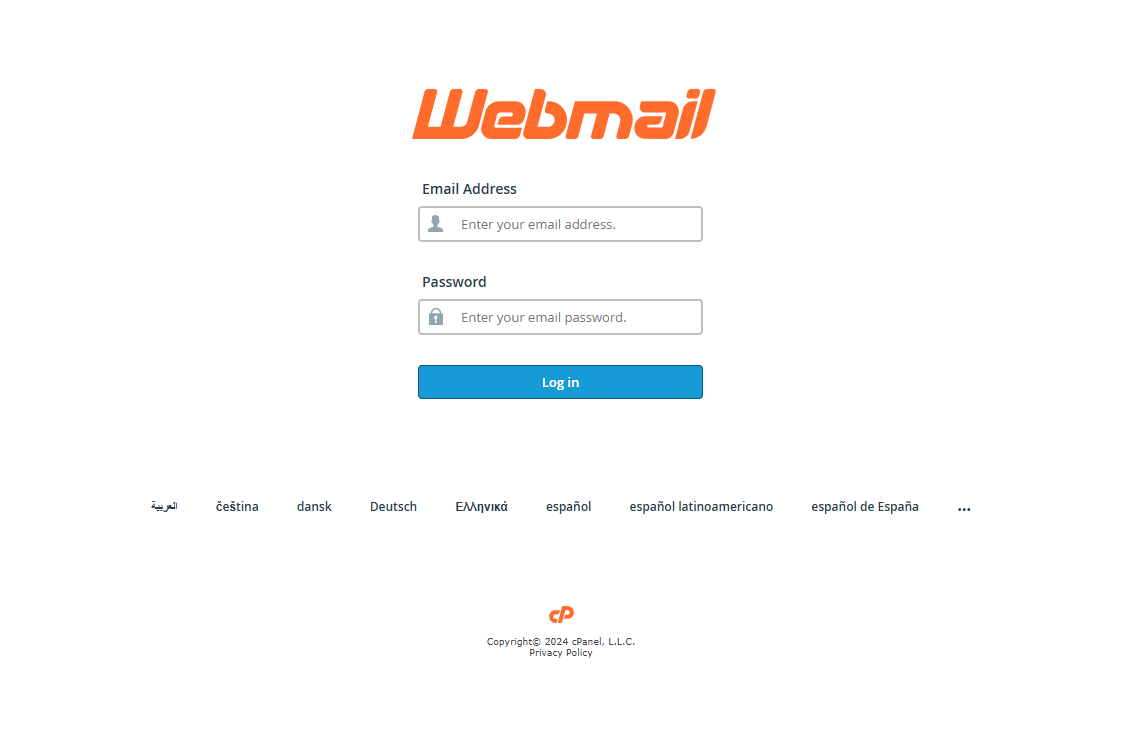
To access your webmail, return to the cPanel homepage and locate the Webmail icon. Click on it to proceed to the Webmail login page.
Or
Visit https:/yourdomain.com/webmail Or https://www.yourdomain.com:2096 Give Your Webmail Address And Password
Step 6: Choose Your Webmail Application
On the Webmail page, you will see several webmail applications available, such as Roundcube, Horde, and SquirrelMail. Select your preferred webmail application (Roundcube is often recommended for its user-friendly interface) and click on the corresponding icon.
Step 7: Log in to Your Webmail Account
Enter your full email address (e.g., john@yourdomain.com) as the username and the password you set earlier. Click Login to access your inbox.

Step 8: Start Using Your Webmail
Once logged in to your webmail account, you’re ready to start sending and receiving emails. Here’s how to make the most of your new webmail account:
- Compose and Send Emails: Click on the “Compose” button to start a new email. Fill in the recipient’s email address, subject line, and message body, then hit “Send.”
- Organize Your Inbox: Use folders or labels to categorize your emails. This helps keep your inbox tidy and makes it easier to find important messages later.
- Set Up Filters: Take advantage of filters to automatically sort incoming emails. For instance, you can direct emails from specific senders into designated folders, reducing clutter in your main inbox.
- Manage Contacts: Most webmail applications allow you to save contacts for quick access. Add important contacts and organize them into groups for easier emailing.
- Utilize Calendar Features: Many webmail services come with integrated calendars. Use this feature to schedule meetings and set reminders, keeping you organized and efficient.
- Explore Additional Features: Check for additional functionalities like email signatures, vacation responses, and integration with other apps or tools that can enhance your email experience.
By familiarizing yourself with these features, you can optimize your email communication and enhance productivity in both personal and professional settings. Enjoy the convenience of managing your emails seamlessly through your new webmail account!
Conclusion
Creating a webmail account through cPanel is a simple yet powerful way to enhance your email communication. By following the steps outlined in this guide, you can set up your professional email account quickly and efficiently. Enjoy the benefits of having a dedicated email service that aligns with your brand!


